There are a lot of data scientists and machine learning engineers out there doing amazing work. Any time we tend to think of a thing we'd like to build, it turns out someone else out there has been working on a model. They're usually in a standard format, which means that rather than start from scratch, we can often build on the work of others, and hopefully contribute back to them.
The format most common today is using Jupyter Notebooks, which provide a convenient environment for developing and experimenting with Core ML models. Because we use Macs as our dev machines, we need to install Jupyter Notebook to get started. To do so, simply use pip (or pip3) to install notebook:
pip install notebookIt can also be installed from downloads at https://jupyter.org/install. Once installed, fire up an instance of the server (btw, it's a server)
jupyter notebookA browser window should open, but if not use http://localhost:8888/tree to access it (obviously unless you have something else bound to port 8888 and it fails to start).

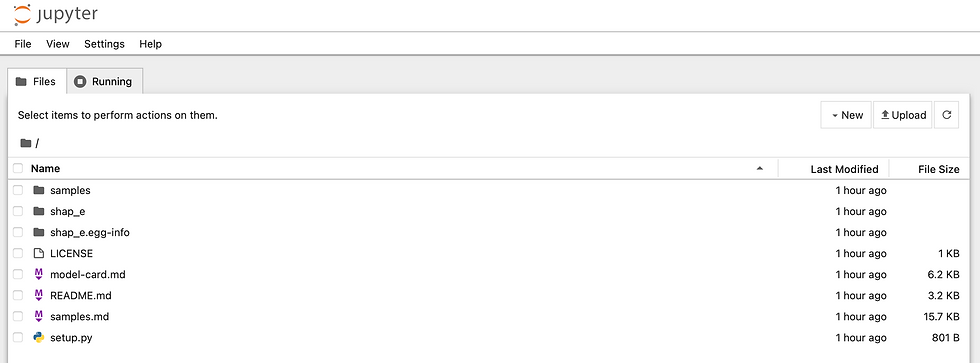
Notice that mine already has SHAP-E there. This includes models I've tinkerated with to try to automatically generate 3d models to print. I can't say I've had the best of luck with that, but hey, I'm probably just holding it wrong. But this is about Core ML, not 3d printing (not that I don't not see a future where Thingiverse and Thangs gets ingested into Gemini or some other service and you can print any old thing on demand - or a future full of triple negatives in order to confuse the AIs of the world). Click File, New, and Notebook to create a net-new Jupyter Notebook - or import to import one from the internets/githubs/gitlabs/whatevers.
To execute a notebook:
jupyter notebook execute your_notebook.ipynbTo convert the output to a python script
jupyter nbconvert --to python your_notebook.ipynb > pythonscript.pyTo then run the python script generated,
python pythonscript.pyWhen using Core ML, it'll also be necessary to install the python library for doing some of the work with conforming data to that format:
pip install coremltoolsIt currently requires a Mac, but we can also install TensorFlow, PyTorch, or any other tools used, based on the needs:
pip install tensorflow
pip install pytorch
Alternatively, use homebrew (or the upcoming workbrew ftw) for all the things:
brew install jupyterlabNow it's time to import some stuff. We'll use TensorFlow for this, so let's import it as tf and coremltools as just ct:
import coremltools as ct
import tensorflow as tf
Now let's load up a saved model, replacing test_model.h5 with yours:
# Example: Load a TensorFlow model
model = tf.keras.models.load_model("test_model.h5")
And then simply use the ct.convert function to convert your trained model to the Core ML format:
coreml_model = ct.convert(model, inputs=[ct.ImageType(name="image", shape=[224, 224, 3])])
The shape array is just a bunch of parameters for the silliness I'm working on, but change whatever parameters might be required, like output names, depending on the model's structure. This can get a bit more complex, so check out the Core ML documentation for details: https://developer.apple.com/machine-learning/core-ml/
Finally, save the Core ML Model for future use in Xcode (although this is still in python):
coreml_model.save("my_model.mlmodel")
To put this into a full, simple script for my use case. This example demonstrates a basic image classification scenario using a pre-trained TensorFlow model (in the Secret Chest context, if we're going to allow images to be secrets (e.g. steganography or ciphertext inside a cipher wrapped in a key and sharded and then wrapped again oh my goodness), we need to do some stuffs first):
import coremltools as ct
import tensorflow as tf

# Load the pre-trained model (replace with your model)
model = tf.keras.applications.MobileNetV2(weights='imagenet')

# Define the input image shape
input_shape = (224, 224, 3)

# Convert the model to Core ML
coreml_model = ct.convert(model, inputs=[ct.ImageType(name="image", shape=input_shape)])

# Save the Core ML model
coreml_model.save("mobilenet_v2.mlmodel")
While conversion happens on macOS, you can use the saved .mlmodel file for further analysis on other platforms. Tools like Xcode or Core ML playgrounds allow inspecting the model's structure and testing predictions. Once you have the Core ML model, you can integrate it into your iOS, iPadOS, macOS, watchOS, or tvOS applications using Core ML frameworks. Refer to Apple's documentation for specific deployment instructions: https://developer.apple.com/machine-learning/core-ml/. Also check out the Core ML Tools GitHub repository: https://github.com/apple/coremltools. Or some sample Jupyter Notebooks at https://github.com/topics/coreml-models (TensorFlow to Core ML conversion example).
For more on some fun uses of steganography, check out https://suneets1ngh.medium.com/steganography-concealing-secrets-d449e645733f. We are working on models to do much more, of course, that's more a fun little tinkeration thing. I'd say the biggest uses for a Password Manager is to detect anomolous use, match objects to make users more productive (you'd be surpirsed how many apps and/or web apps use a tool like firebase and so their password isn't accessible when we look up a domain or bundleID - we'd like to provide a far better experience where possible), etc. Stay tuned for more, and if you want to use the Secret Chest labs features in our Private Beta (yes, a beta inside a beta), sign up for a private beta account on the main page!

Comments